A Guide To Creating A Solar Powered Water Feature
How about creating your very own water feature this year?
It’s so very easy to install and it will only take a few minutes so you can be away enjoying a water feature in no time at all!
We set up a Pebble fountain Water Feature here at UK Water Features HQ to see exactly how simple it really is!
Remove all of the outer packaging so all contents are fully visible. All components can be seen as listed below:
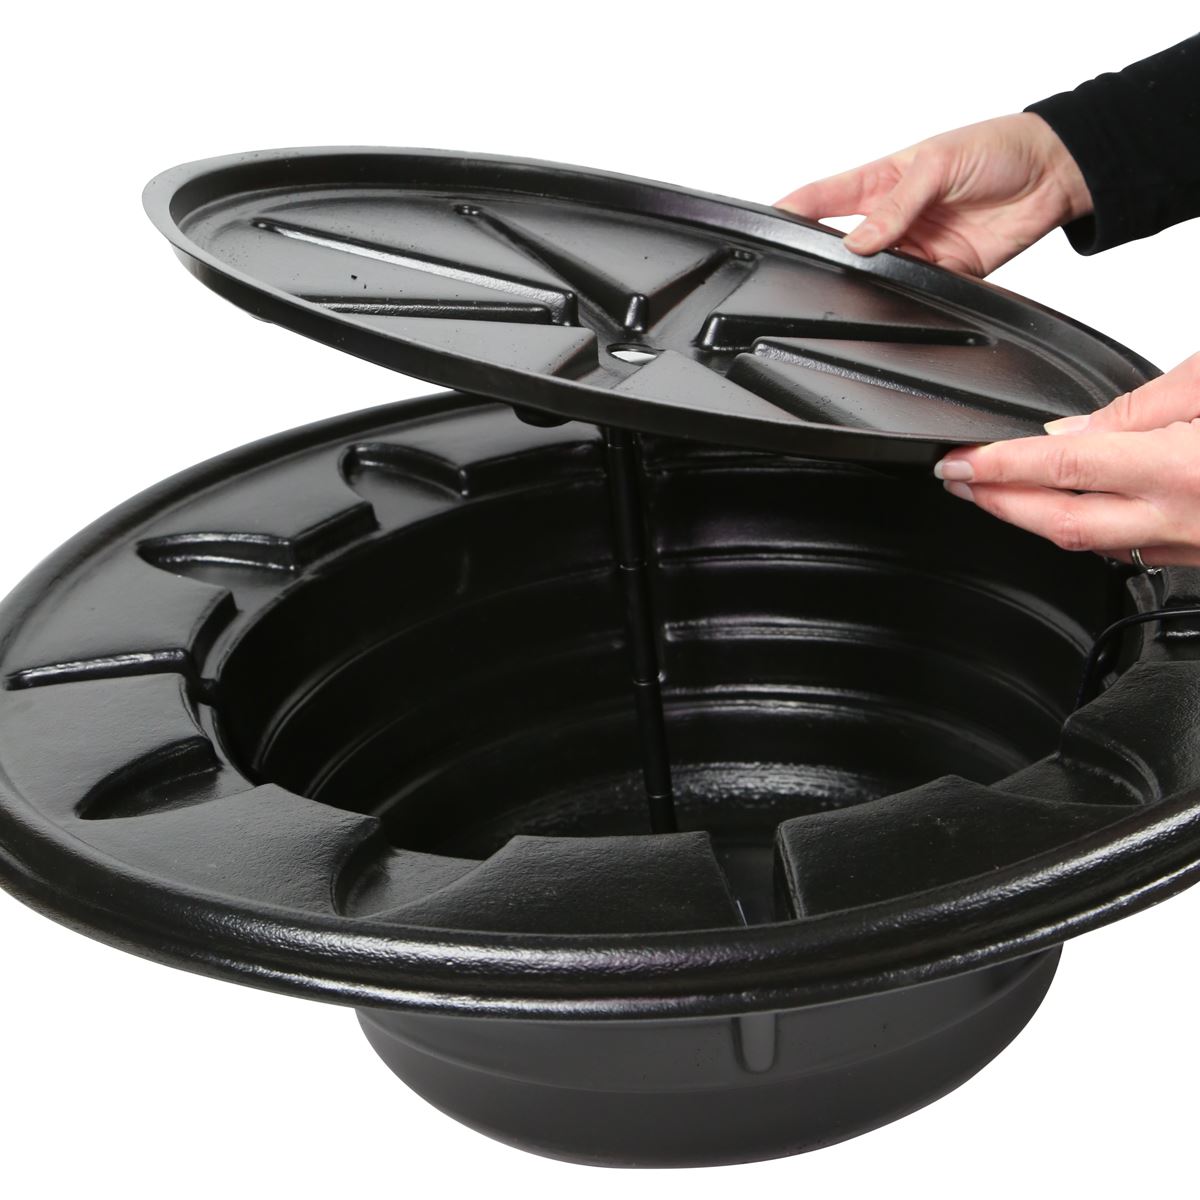
A – Pebble Pool base
B – Pebble Pool Lid
C – Solar Panel
D – LED Light
E – Pump
F – Fountain Head Attachments

Place the pebble pool base (A) where you are wanting your water feature in your garden, either freestanding or placed into the ground.
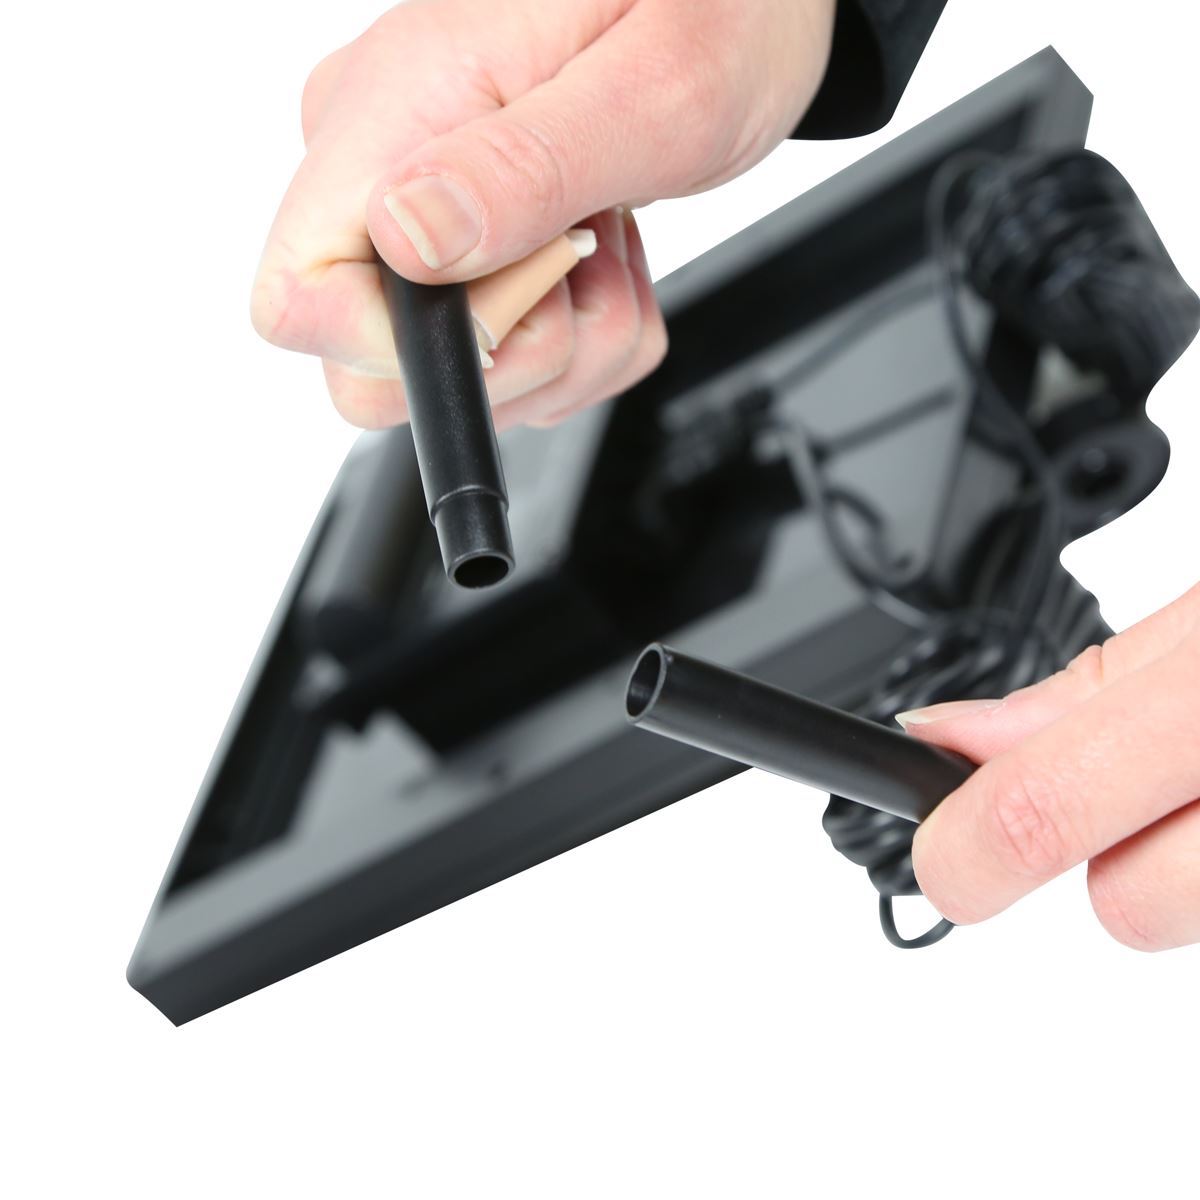
Secure all attachments (F) together to form a long pipe which can then be fixed onto the pump (E).

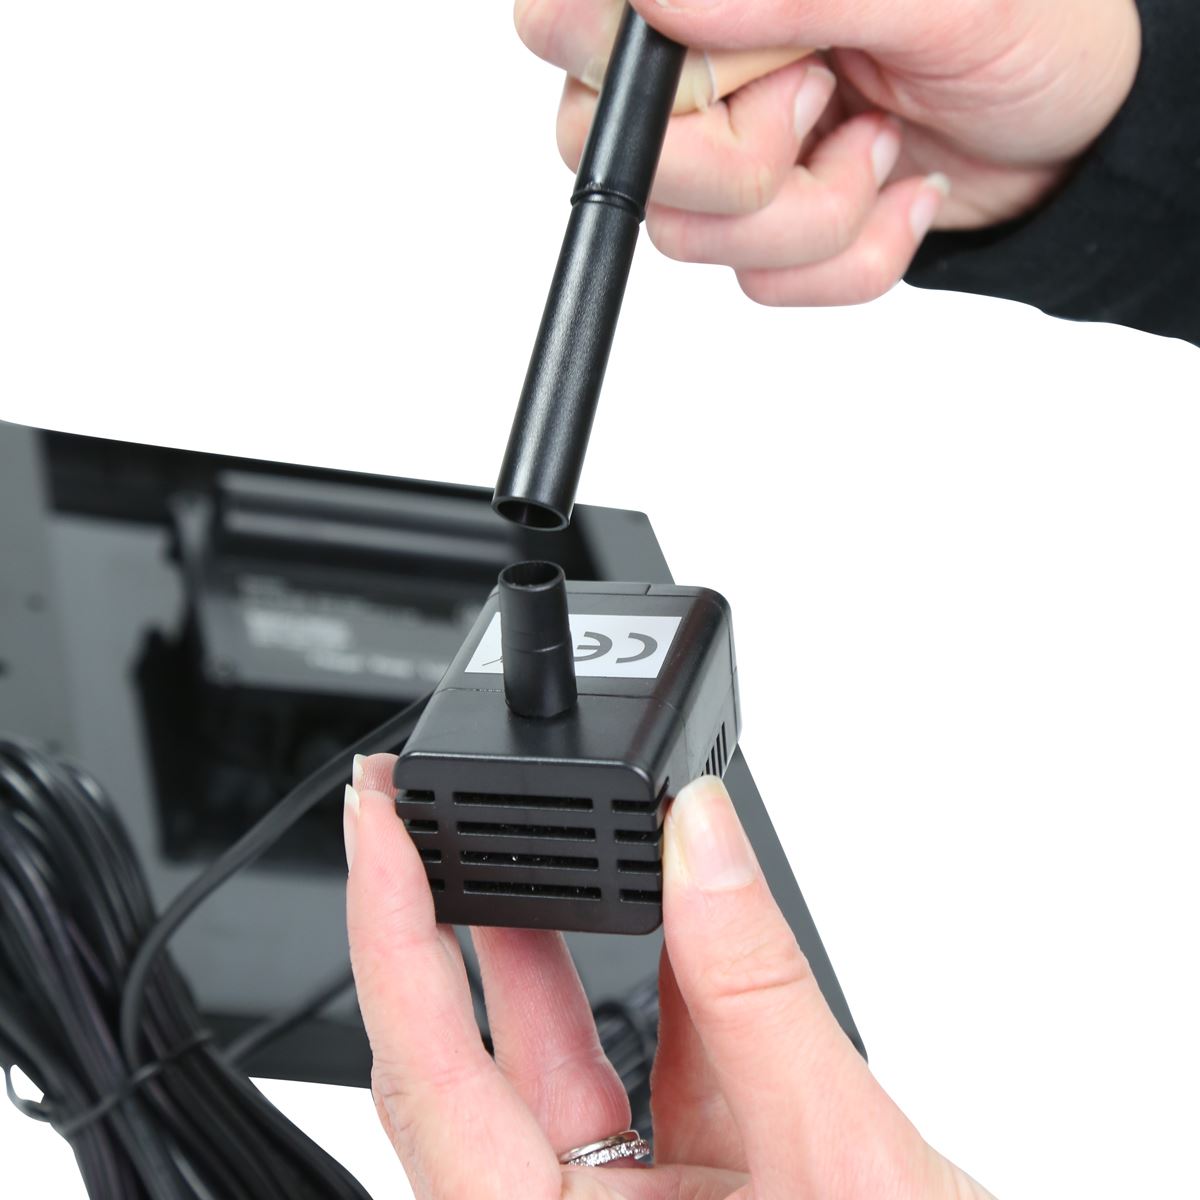
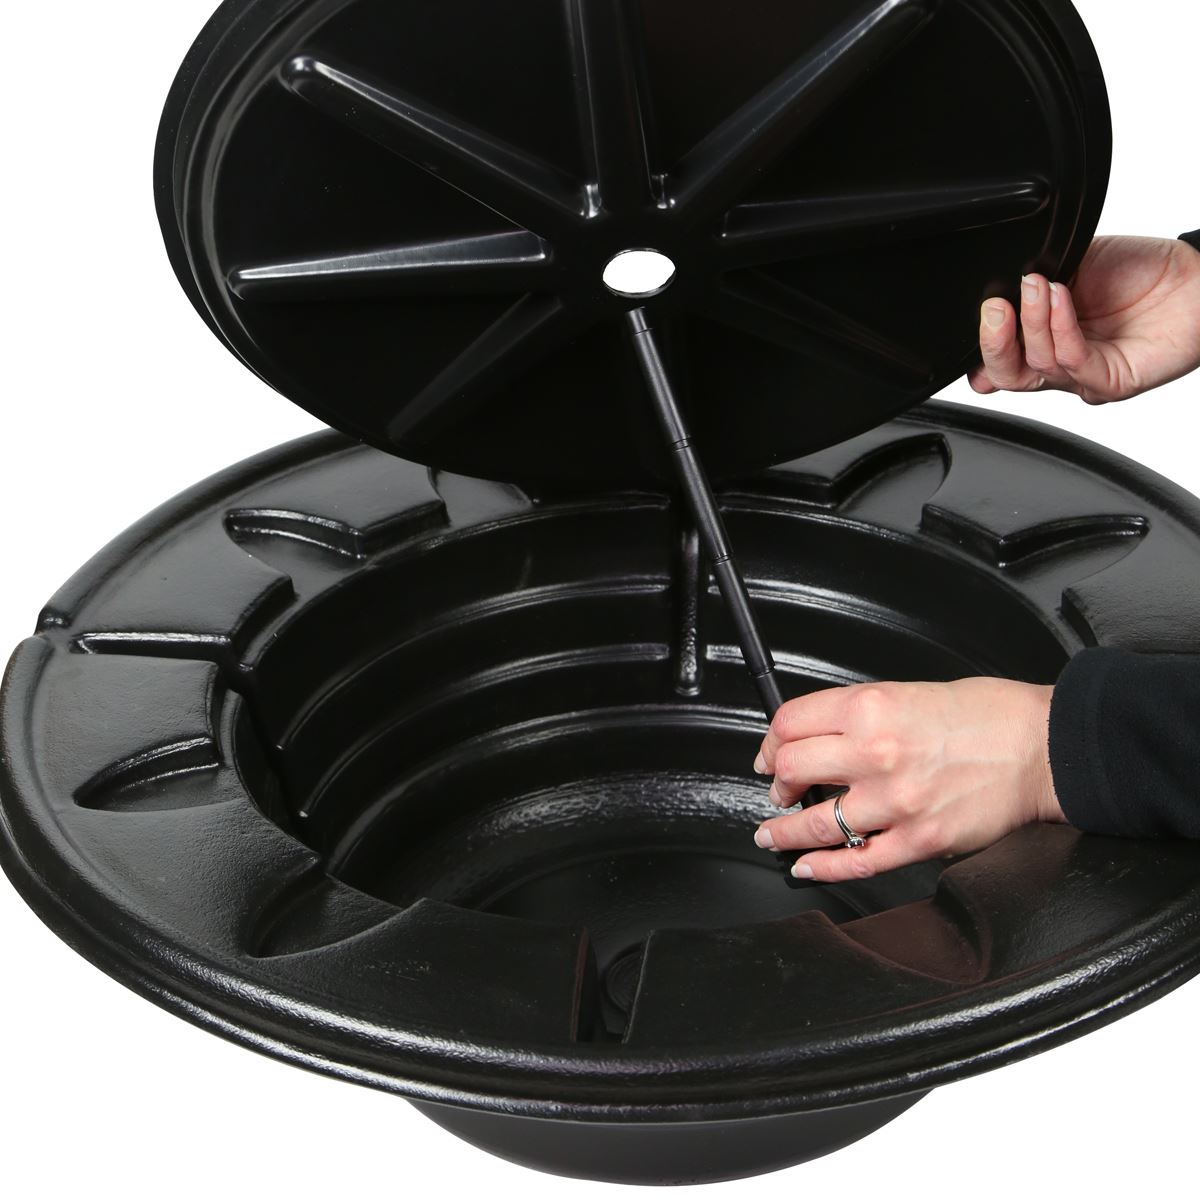
Insert the pipe which should now be attached to the pump through the pebble pool lid (B) and secure the pump to the base (A).
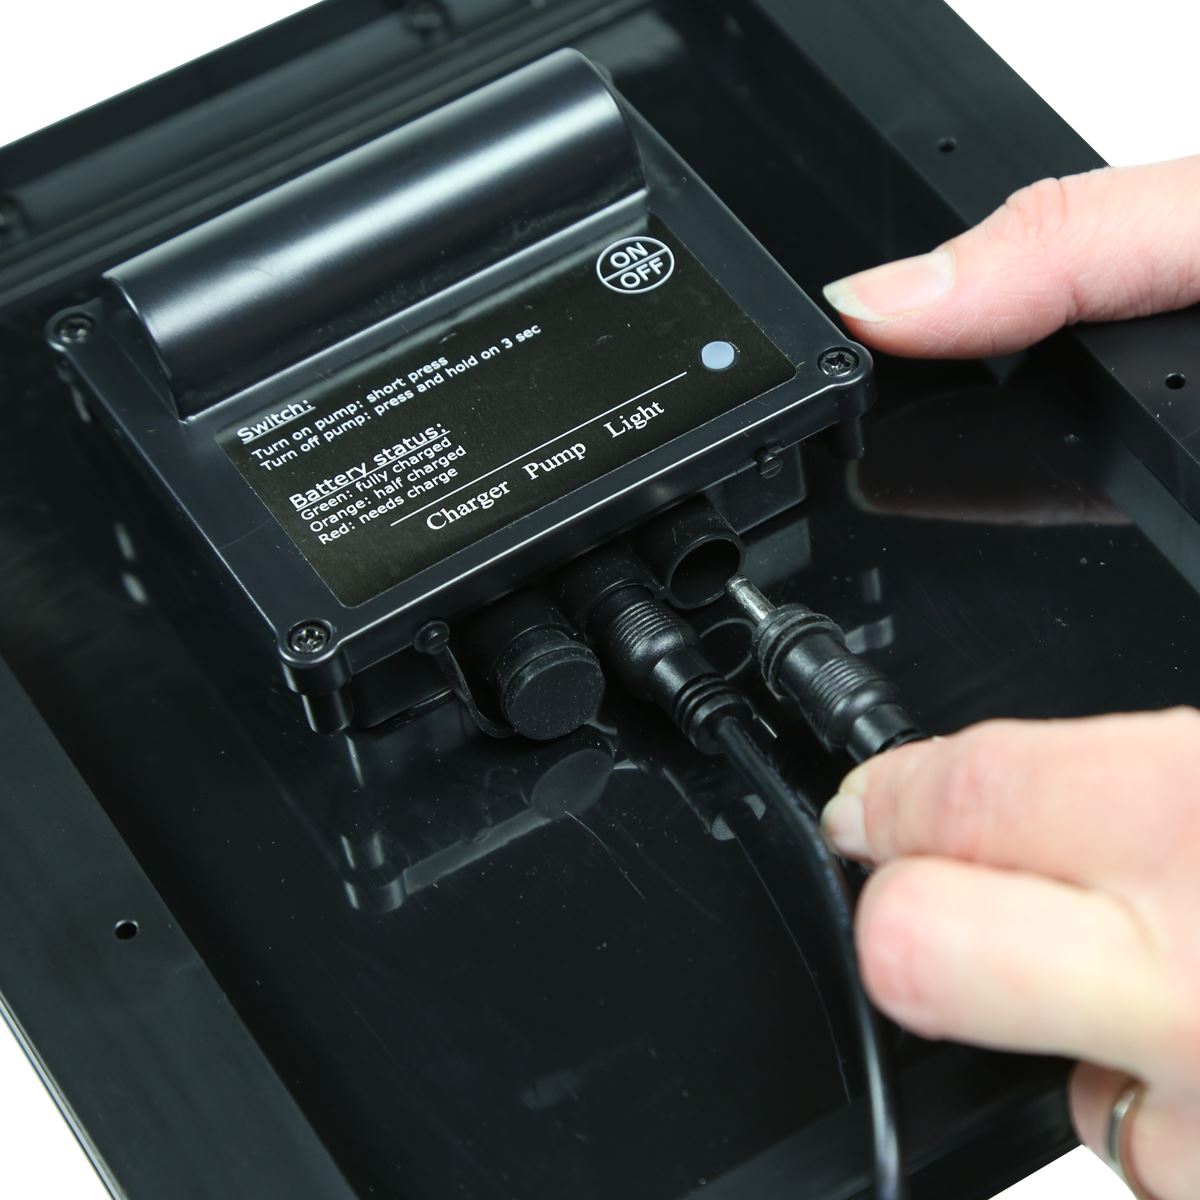
Thread the power cable from the pump through one of the grooves around the edge of the pebble pool base (A). Fill the pebble pool with water before inserting the power cable from the pump into the solar panel (C). This will prevent the pump running dry and burning out. Place the lid (B) onto the base securely. Place the chosen fountain head attachment (F) on the top of the pipe.

The solar pump also has an LED feature (D) which plugs into the back of the solar panel (C) and can then be placed wherever you prefer to illuminate your feature. Plug the power cable from the pump (E) into the solar panel (C).
And there you have it! Your brand new Solar Powered Water Feature is ready to go - sit back and enjoy!