Dual Entry Water Blades
Dual Entry Water Blades
Click here to go back to our new Dual Entry Water Blades.
The new dual entry blade can now be used for either bottom entry installation or rear entry, simply by capping off the entry not needed with a bung which is included with each water blade.
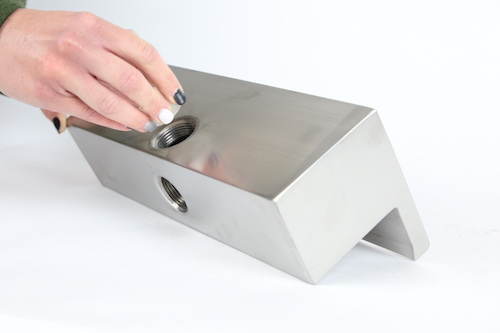
- First thing is to select which entry blade you want.
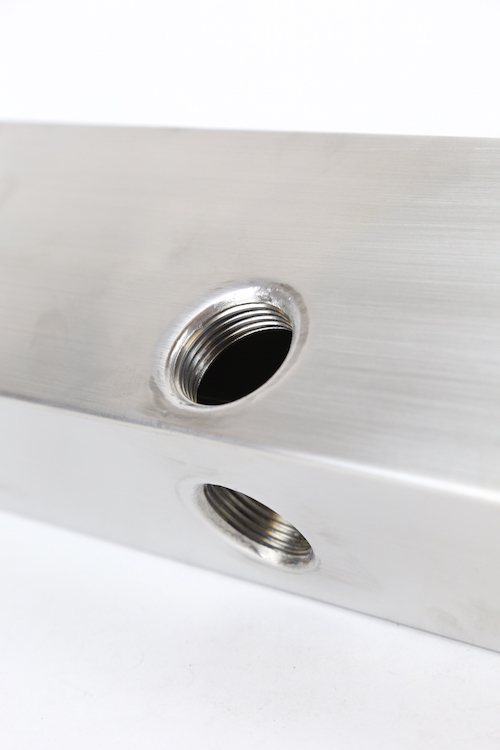
- Once you have made the decision you simple need to cap off the unwanted, insert the clear plastic bung and twist to secure
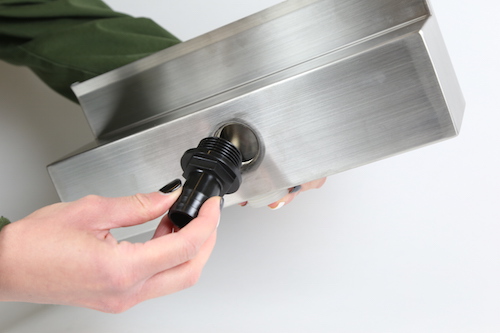
- Take the hose tail and attach to the outlet you are wanting to use. Simple twist in to place to secure, this is what your pipe work attaches to.
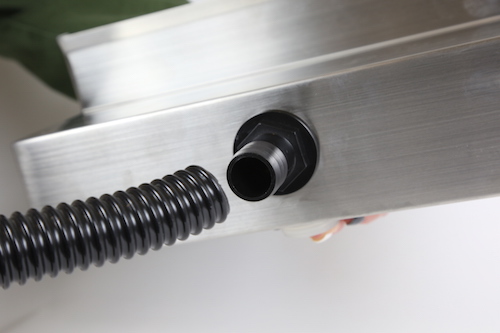
- Simply take the pipe work and push on to secure.
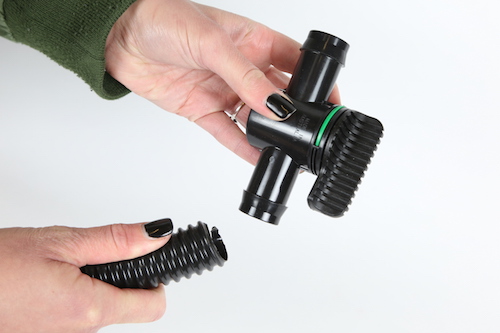
- If you are using a flow regulator this can also be added where you wish.


Fitting a blade
This one is always a hard one to advise customer’s upon as everybody fits the blades so differently depending on their specific requirements. Below are a few points that you need to take into consideration when fitting any type of blade.
- Place the blade at the height you require. (We recommend between 1m to 1.5m in height or distance away from the pump, take into consideration the depth of the reservoir here as well.)
- Sit the blade on a level surface, either a course of bricks or a frame using wooden decking.
- If you are placing a light in the blade, place a 25mm pipe into the wall, so you can route the cable to the back of the light without cutting the connection to the transformer. This will be in the top corner of the blade at the end near the top.
- Screw in the hose tail for fittings of the pipe work later.
- If you are planning on building above the blade use a flat bar or lintel to support the wall above the blade. DO NOT REST THE WALL DIRECTLY ON THE BLADE.
- Dig the reservoir in at the bottom of the wall, making it as tight and compact as possible to fit the shape of the reservoir, back fill as you go this will ensure you do not get distortion and will ensure a better fit.
- Make sure you have a hole at the bottom of the wall to run the water pipe up the back or drill one into the wall if the wall is already built (this applies to rear entry blades only).
- Place the pump into the reservoir and route the cable through a conduit to the electric point. Connect the pipe to the pump and install up the back of the wall.
- If using 2 or 3 feeds to the blade inlet place the flow control valve between the manifold and the blade, leave sufficient pipe work for water restriction to take effect.
- If using a light, push into the gap at the top of the blade, route out the cable over the edge of the blade and bend over the clip over to secure inside the blade.
Tip: make sure both the pump and the light work before installation. Always make sure that pump has sufficient water to cover it before switching on for testing and in operation. This will save you time should any problems occur and you will not need to dismantle all your work.
- Fill the reservoir with water when all connections have been made. Switch on the pump and you should see the water filling up in the back of the blade.
- If the water looks like it is breaking up, check the flow is not too fast by adjusting the flow valve.
- Watch the water rising in the blade, if it looks like it is bubbling you need to correct the flow, it should be calm with the same amount of flow form each inlet (if using a larger blade.)
- Make sure the drop of water is not falling directly on the pump, the pump should be placed in a corner away from the wall.
- Also check when you are installing the blade it is not in an exposed area as weather conditions such as wind and drafts will affect it and make wet areas around the blade and reservoir, in some cases this is unpreventable.
- Water from the blade should fall into the reservoir to re-cycle, always check water levels on a regular basis.
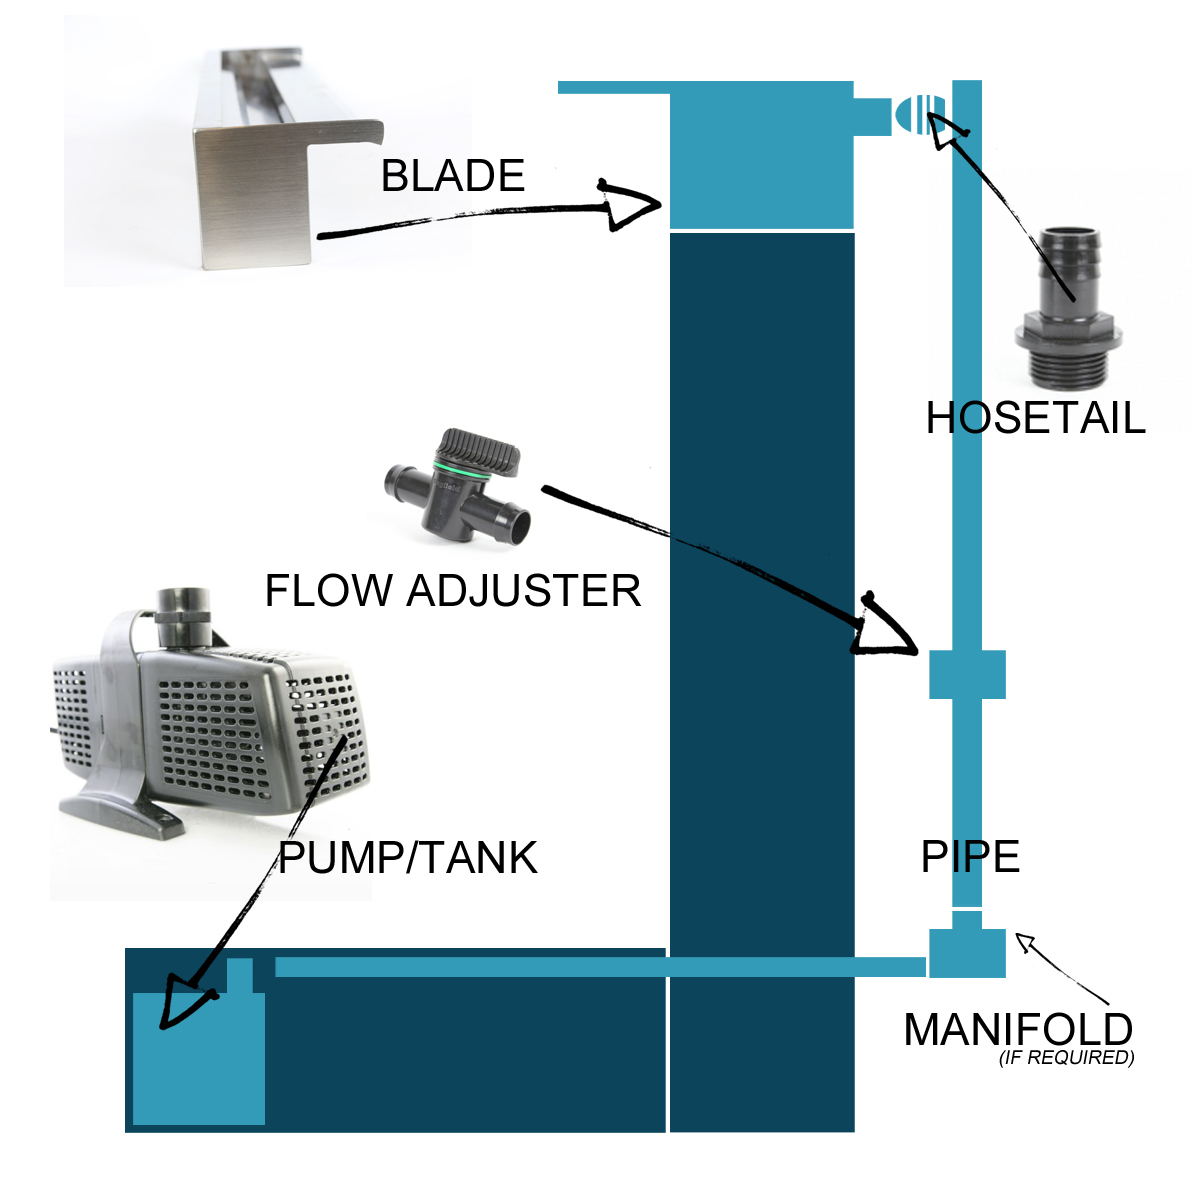
WATER BLADE BOTTOM INSTALL DIAGRAM...
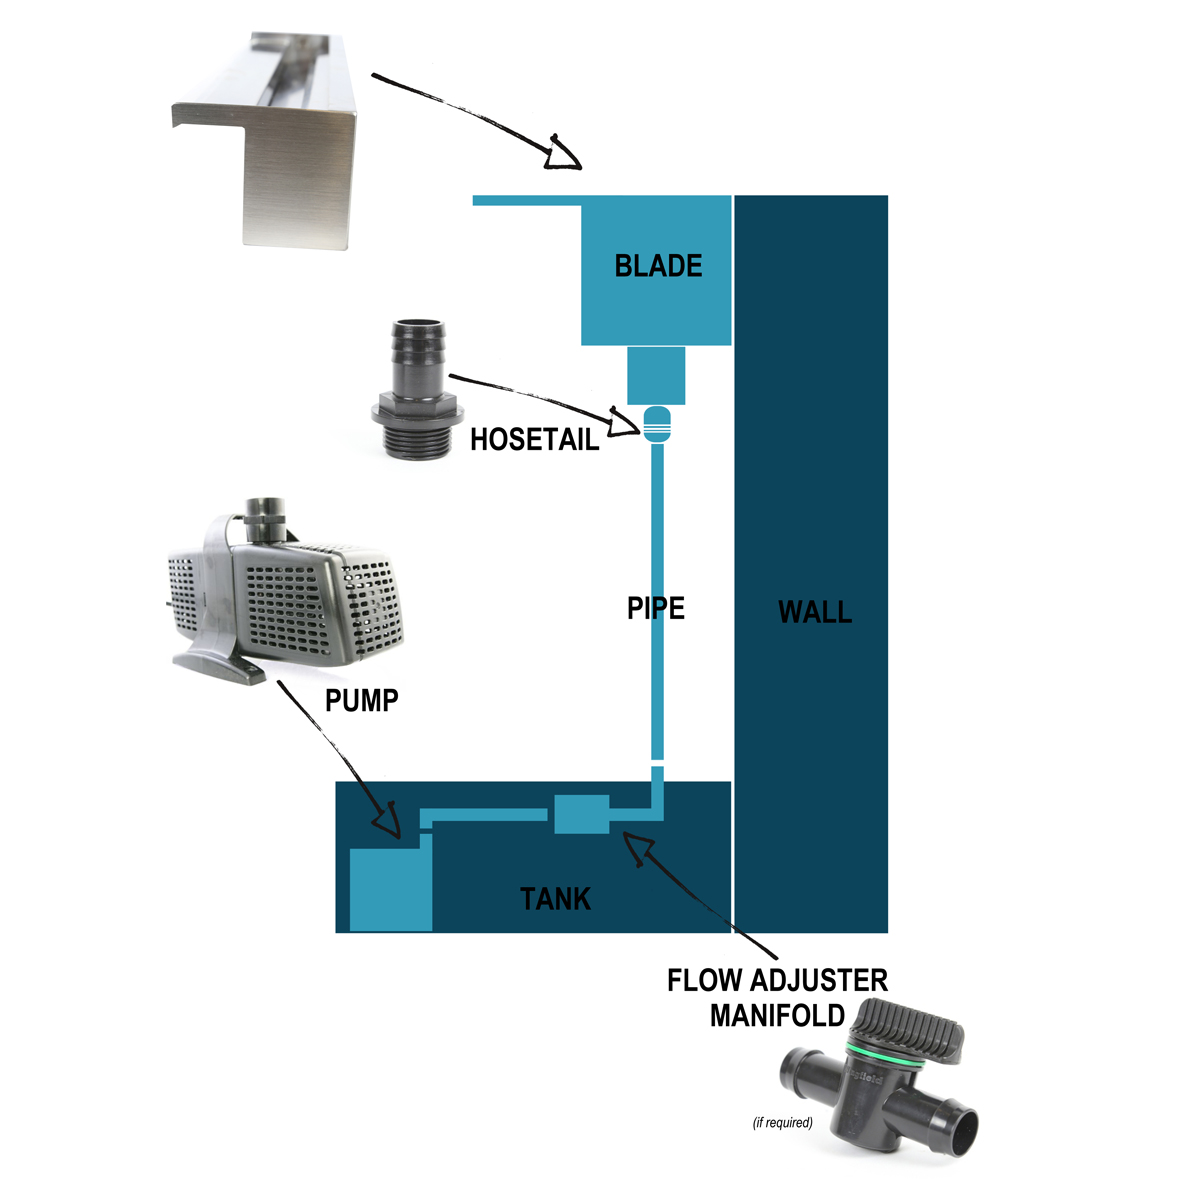
WATER BLADE REAR ENTRY INSTALL DIAGRAM...